Discover amazing discounts on sewing patterns-Fabric-Doll CLothes-eBooks-Yarn-& Other Handmades!
How to Maintain Your Sewing Scissors
Learn how to clean, sharpen, and oil your sewing scissors for smooth cutting—and sew a simple sheath to protect the tip and extend their life.
SEWING TOOLS
7/4/20253 min read
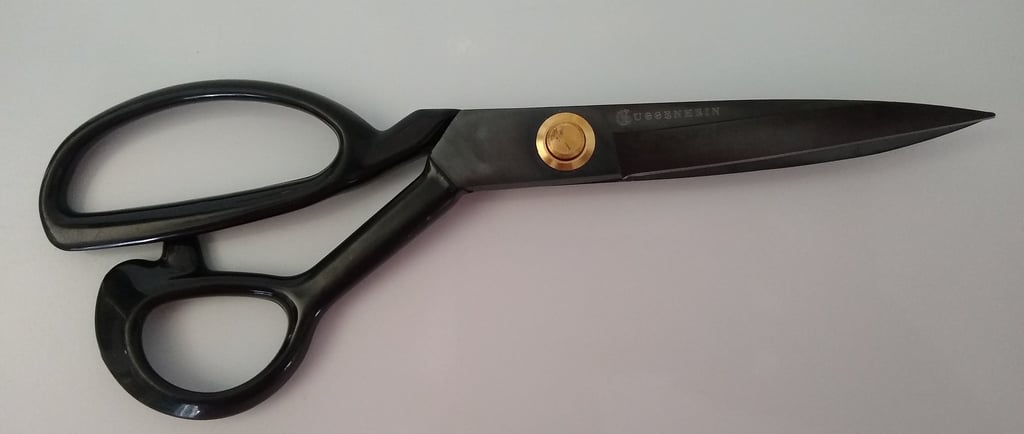
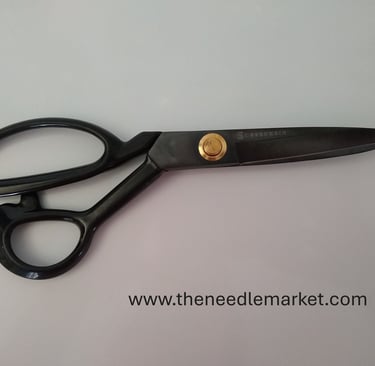
The Best Way to Cut Patterns Is With Good Scissors
Your sewing scissors may seem like a simple tool, but they need care just like your sewing machine. A clean, sharp pair of scissors makes cutting smooth, accurate, and frustration-free. If they’re dull, they’ll snag fabric, pull threads, and give you crooked edges—not the result anyone wants in a sewing project.
Sewing scissors require regular cleaning, sharpening, and oiling to maintain their optimal condition. The good news? It’s easier than you think, and you don’t have to take them to a professional. Sure, you can—you’ll find plenty of sharpening services at sewing stores and even hardware shops. But I always say: it’s better to be self-sufficient and save your money for fabric, patterns, or that new sewing tool you've had your eye on.
✂️ Why Maintenance Matters
Dull scissors = uneven, ragged cuts
Sticky blades can cause your fabric to become gummed up.
Rust shortens the life of your scissors.
Proper oiling keeps the pivot smooth.
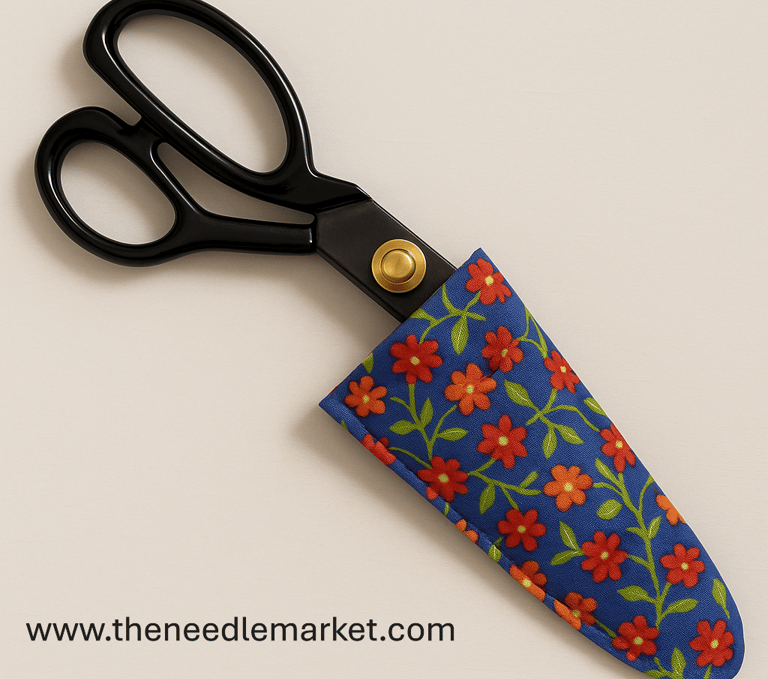
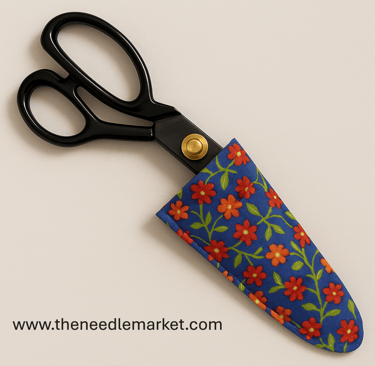
A sheath, such as a leather case, protects the tips for precision cutting in tight corners.
✨ Tip: Always store your scissors with a sheath or case to protect the sharp tip, essential for detail work in fine corners or delicate fabrics.
🧼 Step-by-Step: How to Clean, Sharpen & Oil Your Sewing Scissors
1. Clean the Blades
Wipe your scissors with a soft, lint-free cloth. For sticky residue (from interfacing or tape), use a bit of rubbing alcohol or warm soapy water on a cloth—never submerge the scissors in water. Dry thoroughly.
2. Sharpen the Blades
You can use:
A sharpening stone or whetstone (gently follow the blade edge)
A scissor sharpener tool made for sewing scissors, such as the Fiskars Scissor Sharpener. I keep a Fiskars Scissor Sharpener handy in my sewing room.
Or even cut through aluminum foil or fine-grit sandpaper several times in a pinch.
Remember: always follow the natural angle of the blade.
3. Oil the Pivot
Apply one drop of sewing machine oil to the screw or pivot point. Open and close the blades a few times to distribute it. Wipe off any excess.
✨ Tip: Never use WD-40 or household oil—it can gum up or stain fabric.
🔁 How Often Should You Do This?
Clean: every couple of weeks (more often if you cut sticky fabrics)
Sharpen: monthly if you use them a lot, or as needed.
Oil: every few months or when they feel stiff
🧵Caring for your sewing scissors may seem like a minor task, but it makes a significant difference in your sewing results. Good scissors help you cut straight, keep your fabric smooth, and make sewing a more enjoyable experience.
So next time you sit down to cut out a pattern, ask yourself: Are my scissors in top shape?
Because the best way to cut patterns is always with good scissors.
✂️ Bonus Tutorial: How to Sew a Simple Scissor Sheath
Protect Your Sewing Scissors with a Quick Fabric Sleeve
Sewing scissors are one of your most important tools, and keeping the tip protected ensures clean cuts, especially in tight corners or delicate fabrics. A handmade sheath is an easy project you can whip up with scraps from your stash!
🧵 Materials
Two fabric scraps (outer and lining): approx. 8" x 4"
Medium-weight fusible interfacing (optional, for sturdiness)
Matching thread
Sewing machine or hand needle
Scissors (for size reference)
Pins or clips
✨ Optional add-on: Small snap or button for closure
📏 Instructions
1. Cut the Fabric
Cut 2 pieces of fabric (outer + lining), approx. 8" x 4"
Cut 1 piece of interfacing the same size, if using.
2. Shape the Sheath
Stack your outer and lining fabric, right sides together.
Using your scissors as a guide, trim the rectangle into a rounded triangle shape—wider at the opening and narrower at the tip
3. Fuse the Interfacing
If using interfacing, fuse it to the wrong side of the outer fabric, following the package instructions
4. Sew the Layers
Place the outer and lining right sides together
Sew around the edge with a ¼" seam allowance, leaving a 2" gap at the bottom wide end for turning.
5. Clip & Turn
Clip the corners and curves.
Turn the sheath right side out through the gap.
Press it flat, tucking the raw edges of the gap in.
6. Topstitch to Finish
Topstitch around the entire sheath, closing the gap as you go.
Slip your scissors in—done!
🧷 Optional Closure
Add a snap or button with a loop to keep your scissors extra secure when traveling.
🪡 This little project doesn’t take much time, but it protects your investment and keeps your scissors sharp and clean. You can match it to your sewing space or even sew several for gifting!
You can bookmark or copy and paste this page for future reference.
Happy Sewing!
Be sure to visit my sewing shop for the latest and greatest treasures!
Written by Rhonda Harris | The Needle Market - For more sewing tutorials and handmade inspiration, visit www.theneedlemarket.com
Curated Sewing Goods Online – Based in the USA
Reach Out Contact Me
rhonda@theneedlemarket.com
Proudly powered by Hostinger
Start your own site with Hostinger

