Discover amazing discounts on sewing patterns-Fabric-Doll CLothes-eBooks-Yarn-& Other Handmades!
Tailoring Basics for Men’s Garments
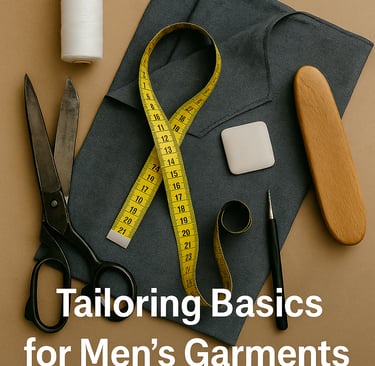
Learn the essential tailoring basics — interfacing, darts, facings, and pressing — to give men’s handmade garments a professional fit and finish.
SEWING & STYLING TIPS FOR MEN
Rhonda Harris
10/29/20252 min read

Simple sewing techniques that elevate fit, comfort, and style.
Tailoring is what separates handmade clothes that look “homemade” from those that look professionally sewn. Even casual men’s wear — shirts, jackets, and pants — can benefit from small tailoring details that shape, strengthen, and refine the final garment.
Here are a few tailoring basics every sewist should know when sewing men’s clothing.
👔 1. Interfacing: The Hidden Hero
Interfacing adds structure and support where it's needed most — collars, cuffs, waistbands, and plackets.
Fusible interfacing is quick and ideal for casual shirts.
Sew-in interfacing works better for tailored jackets and wool fabrics.
Always test first on a scrap to match weight and stiffness.
A crisp collar or firm waistband often comes down to the right interfacing choice.
🧵 2. Facings: Clean, Professional Edges
Facings finish raw edges around necklines, armholes, and jackets. They help the garment lie smoothly and keep it from stretching out.
Understitch facings close to the seam to prevent them from rolling outward.
Use lightweight interfacing if you want them to maintain shape.
Facings may seem minor, but they make a huge difference in how polished your work looks.
✂️ 3. Darts and Seams: Subtle Shaping
Men’s garments rely on subtle shaping rather than dramatic curves.
Darts at the back or waist refine fit without being obvious.
Princess seams in vests or jackets give structure through the torso.
Flat-felled seams are strong and neat — ideal for shirts and jeans.
For a clean professional look, always press darts downward and clip seam allowances where necessary.
👖 4. Shoulder and Sleeve Adjustments
Men’s shoulders and sleeves define fit. If they’re off, the whole garment feels wrong.
Check shoulder width before cutting — many patterns run too wide.
Set-in sleeves should have a smooth cap without puckers.
Use a tailor’s ham when pressing curved seams for a crisp shape.
These details help your garment drape naturally, rather than appearing bulky.
🧥 5. Pressing and Topstitching
Pressing is one of the most overlooked tailoring steps — but it’s essential.
Press every seam as you sew to flatten bulk.
Use a pressing cloth to protect the fabric texture.
Topstitch strategically for strength and a polished finish.
A well-pressed garment looks handmade with pride — not homemade in haste.
Tailoring isn’t about fancy equipment; it’s about careful construction and attention to detail. A little interfacing, a few darts, and sharp pressing can completely transform your men’s shirts, pants, and jackets into garments that fit beautifully and look professionally sewn.
Subscribe to The Needle Market for free tutorials, pattern tips, and step-by-step sewing guides to refine your men’s wear projects. The subscription box is in the footer below.
Curated Sewing Goods Online – Based in the USA
Reach Out Contact Me
rhonda@theneedlemarket.com
Proudly powered by Hostinger
Start your own site with Hostinger

